10 Tips for Printing Excel Worksheets Efficiently

Helpful Strategies for Printing Your Excel Data (and Saving Time and Paper)
by Avantix Learning Team | Updated August 10, 2020
Applies to: Microsoft ® Excel ® 2013, 2016, 2019 and 365 (Windows)
Most users at one time or another have printed an Excel worksheet and been less than pleased with the result (like printing 20 pages with one column). Check out these 10 tips to print what you want and avoid aggravation and wasted paper.
1. Previewing before you print (including full screen preview)
If you can get into the habit of always previewing before you print, you can avoid printing worksheets that don't print the way you want.
When you click on the File tab in the Ribbon and choose Print, you'll see a preview on the right. You can click on the next page icon on the bottom left of the preview screen to go from page to page.
If you prefer to preview in full screen as in older versions of Excel, you can add a Print Preview Full Screen command to your Quick Access Toolbar:
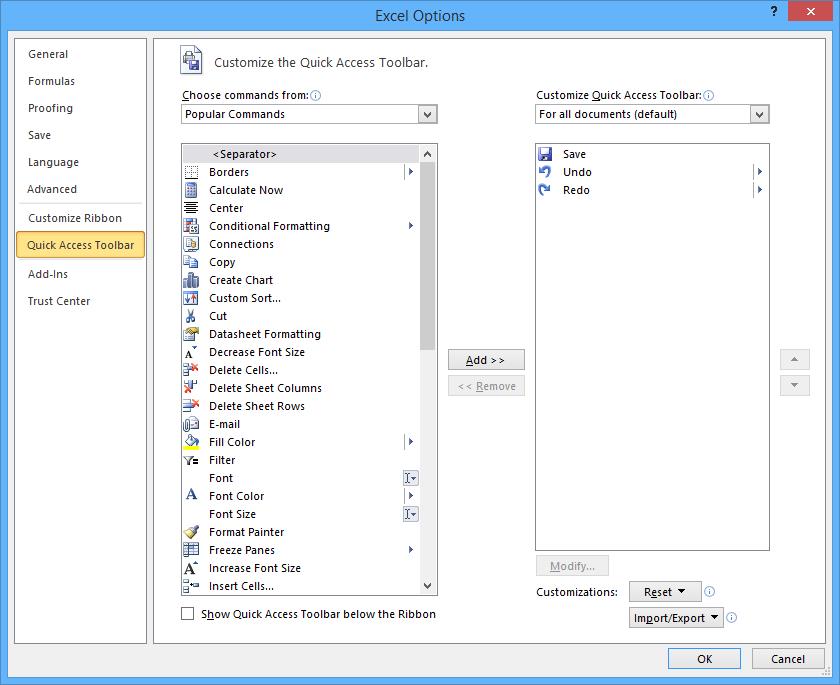
- Click the down arrow to the right of the Quick Access Toolbar (this is usually above the Ribbon by default).
- Choose More Commands. A dialog box appears. Note that the Quick Access Toolbar is selected on the left.
- Under Choose commands from: choose All Commands.
- Click the Print Preview Full Screen button in the list of buttons.
- Click Add >>.
- Click OK. The button will be added to the Quick Access Toolbar and you can click on it at any time to preview in full screen mode.
2. Setting a Print Area
It's a good idea to set a print area before you print. This avoids printing random data that may have been entered somewhere else on the worksheet.
To set a print area:
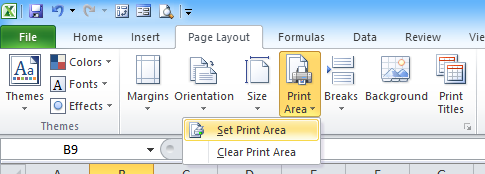
- Select the cells you want to print.
- Click the Page Layout tab in the Ribbon.
- In the Page Setup group, click Print Area.
- From the drop-down menu, choose Set Print Area.
When you print the active worksheet, Excel assumes you want to print the specified print area in the active sheet unless you specify otherwise in the print settings. You can clear the print area by clicking Print Area on the Page Layout tab and choosing Clear Print Area.
3. Printing selected cells
As an alternative to setting a print area, you can choose to print selected cells:
- Select the cells you want to print.
- Click the File tab in the Ribbon.
- Click Print.
- Under settings, in the first drop-down menu, choose Print Selection.
- Click Print.
4. Accessing the Page Setup dialog box
You can specify page setup options on the Page Layout tab through a series of buttons or choose options in the Print pane. However, you can still access and use the traditional Page Setup dialog in 2 ways. First, when you click the File tab in the Ribbon and choose Print, the Print pane appears. Page Setup appears as a hyperlink on the left side of the Print pane. Simply click the link to display the Page Setup dialog.
You can also access the Page Setup dialog through the Page Layout tab in the Ribbon:
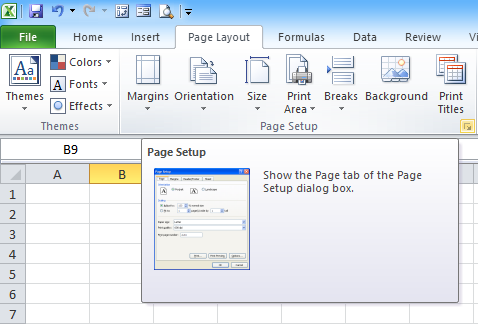
- Click the Page Layout tab in the Ribbon.
- In the Page Setup group, click the dialog box launcher on the bottom right corner of the group. The Page Setup dialog box appears.
5. Scaling to print
Users can specify scale options on the Page Layout tab by entering a scale amount or by choosing options in the Print pane for scaling.
You can also scale using Page Setup:
- Click the Page Layout tab in the Ribbon.
- In the Page Setup group, click the dialog box launcher on the bottom right corner of the group. The Page Setup dialog box appears.
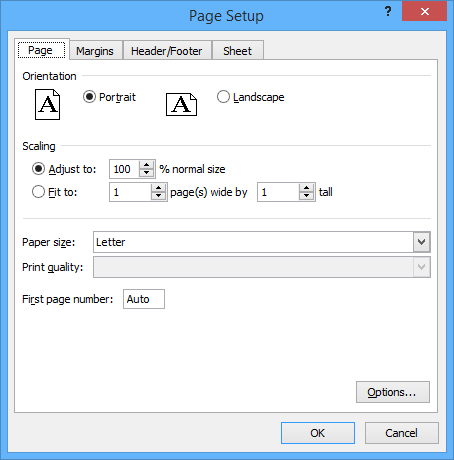
- Click the Page tab.
- Enter a scale amount or choose Fit to Page options.
- Click OK. Be sure to preview the result.
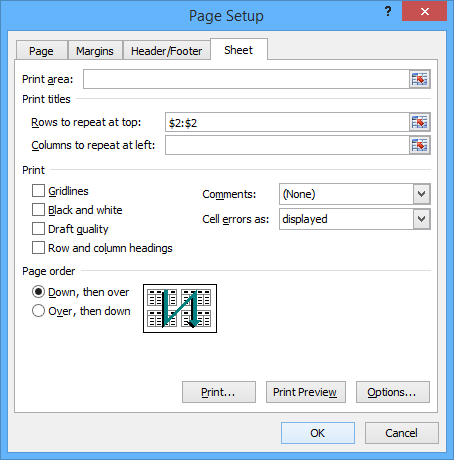
6. Printing titles on every page
With large worksheets, you may want to repeat titles on every page when printing.
To print titles on every page:
- Click the Page Layout tab in the Ribbon.
- Click the Print Titles button. The Page Setup dialog box appears with the Sheet tab selected.
- Click in the edit box for Rows to repeat at top.
- Click in the worksheet on the row(s) you wish to repeat. Be sure to click on the row heading not a cell. The rows will appear in the edit box as absolute references such as $2:$2.
- Click OK.
7. Inserting or removing manual page breaks
Microsoft Excel creates page breaks by default according to your Page Setup or print settings. However, you may want to insert manual page breaks if you want a page to break at a specific location.
To insert a manual page break (in Normal View):
- Select the row where you wish to insert a page break. The break will be added above this row.
- Click the Page Layout tab in the Ribbon.
- Click Breaks and choose Insert Page Break. A manual page break will be inserted above the selected row. It has longer dashes than an automatic page break.
To remove a manual page break (in Normal View):
- Select the row below the manual page break.
- Click the Page Layout tab in the Ribbon.
- Click Breaks and choose Remove Page Break.
8. Setting Page Setup options for multiple sheets at one time
You can set up Page Setup options for multiple sheets at one time (such as headers and footers or page orientation):
- Click the first sheet tab.
- Ctrl-click subsequent sheet tabs. Group will appear in the title bar.
- Click the Page Layout tab on the Ribbon.
- Click the Page Setup dialog box launcher on the bottom right corner of the Page Setup group. The Page Setup dialog box appears.
- Choose the desired options.
- Click OK.
- Click any sheet tab at the bottom to exit the grouped state. You may need to right-click a worksheet tab and choose Ungroup. Group should no longer appear in the title bar.
9. Printing multiple sheets at one time
You can print multiple sheets at one time as well:
- Click the first sheet tab.
- Ctrl-click other sheet tabs. Group will appear in the title bar.
- Click the File tab in the Ribbon.
- Select Print.
- Under settings, choose Print Active Sheets.
- Click Print.
- Click any sheet tab at the bottom to exit the grouped state. You may need to right-click on a worksheet tab and choose Ungroup. Group should no longer appear in the title bar.
10. Printing multiple ranges at one time
To print multiple ranges on the active worksheet:
- Select the first range.
- Ctrl-drag over subsequent ranges.
- Click the Page Layout tab on the Ribbon. The Page Setup dialog box appears.
- Click Print Area and then Set Print Area.
- Click the File tab on the Ribbon and click on Print (active sheets should be selected). The preview appears on the right. Each range should print on a separate sheet.
- Click Print.
If you are familiar with naming ranges, you could use the same strategy with several named ranges.
There are many more strategies for printing including using custom views. Try these out and hopefully you'll have better results in your printed output.
This article was first published on August 10, 2015 and has been updated for clarity and content.
Subscribe to get more articles like this one
Did you find this article helpful? If you would like to receive new articles, join our email list.
